Multisensory handwriting activities that help letters stick
Multisensory handwriting activities teach letter shapes through touch and movement, not just sight. A child traces a letter in a salt tray, in sand, or on a textured surface, so the hand feels the shape before it has to draw it with a pencil. Engaging touch alongside sight builds the muscle memory that makes letter formation stick.
Some kids learn a letter the first time they trace it. Others write it ten times and still forget which way it faces. The difference is often how many senses are in the room. A multisensory approach, used widely by occupational therapists, has a child see the letter, say it, and feel it being formed, all at once. The extra channels of touch and movement give the brain more to hold onto, so the shape sticks.
The good news is that almost none of this costs anything. Salt, sand, a finger, and a baking tray do most of it.
Why do multisensory activities help handwriting?
Because touch and movement build a motor memory that sight alone does not. When a child drags a finger through salt to form an "a", the pull of the grains gives feedback the eyes cannot. That feedback strengthens finger control and the separation between the two sides of the hand, both of which carry straight over to holding a pencil. The letter goes in as a movement, not just a picture.
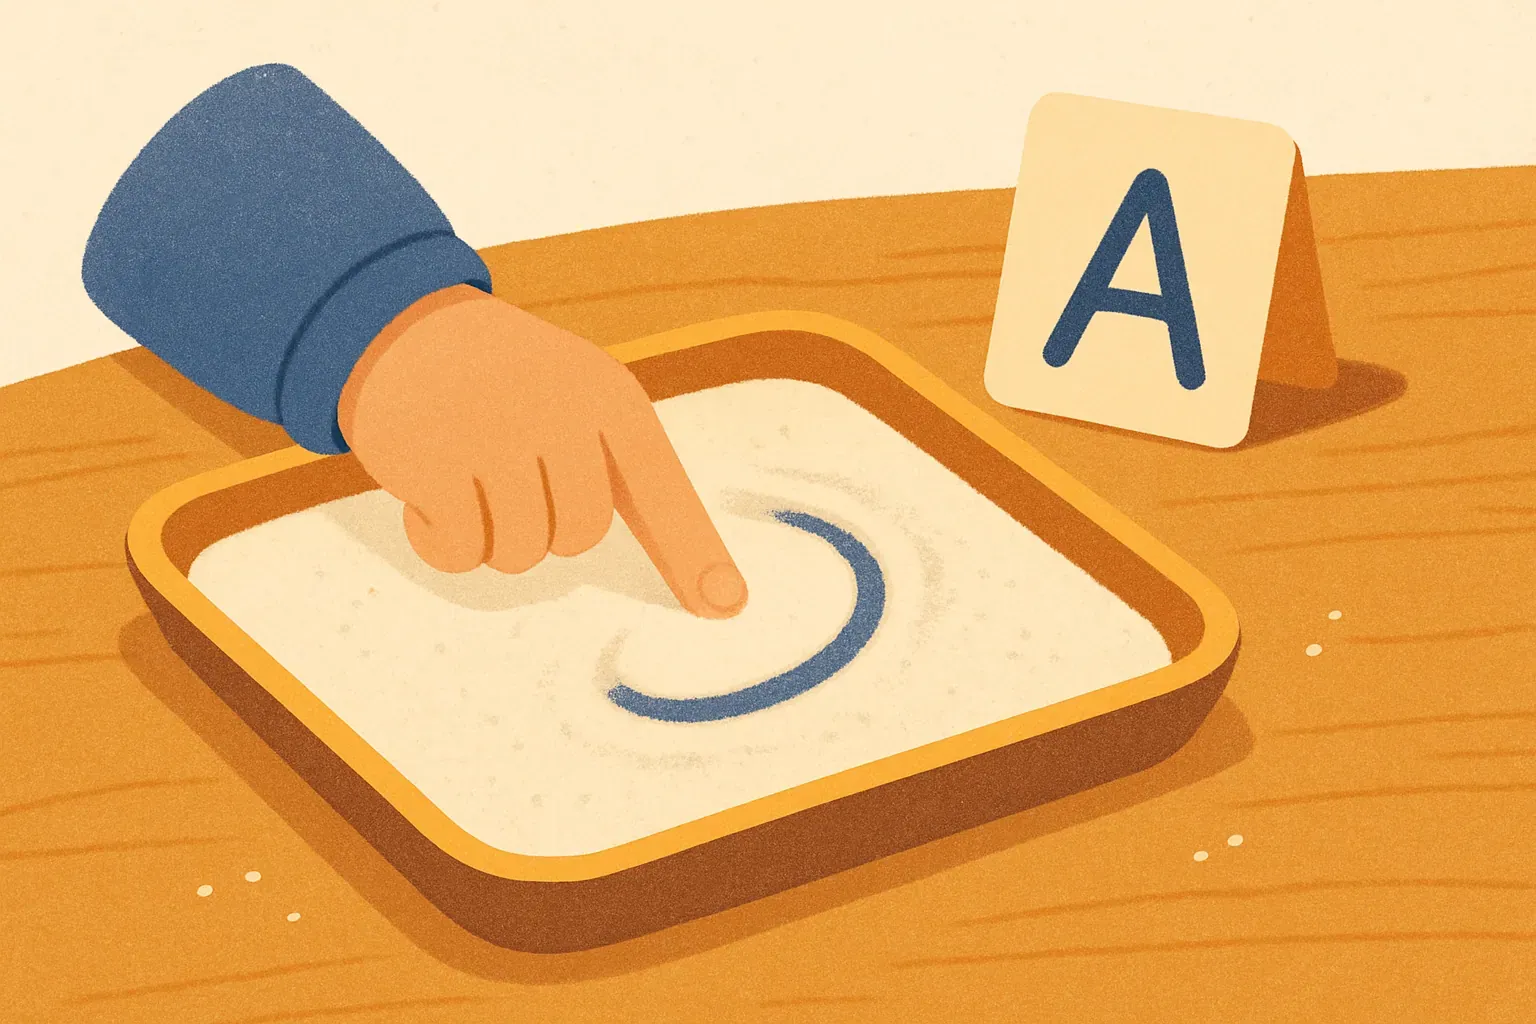
How do I make a salt tray for letter practice?
Pour a thin layer of salt into any shallow tray with a small lip, like a baking pan or a food container, and your child writes letters in it with a finger. Smooth the salt to erase and start again. It takes two minutes to set up and works for letters, numbers, and the child's own name.
- Spread salt about a quarter inch deep across a tray with raised sides so it stays put.
- Add a drop of food coloring to a tablespoon of the salt for contrast, or lay a sheet of colored paper under a clear tray.
- Show the letter on a card, then form it in the salt from top to bottom, the same way it is written on paper.
- Let your child trace it with a finger, then a cotton bud or a craft stick, then shake the tray flat to reset.
What other multisensory tracing activities work?
Plenty, and variety keeps it fresh. The point is always the same: feel the shape while you see it. Rotate through a few so the child does not get bored of any one.
- Trace letters in sand at the park or in a sandbox with a stick or a finger.
- Write on a foggy window or a steamed-up bathroom mirror with a fingertip.
- Form letters in a thin layer of shaving cream or pudding on a tray, which adds smell to the mix.
- Trace over sandpaper letters or a rough texture, so the hand feels resistance along the stroke.
- Make letters with play dough rolled into ropes, then trace them with a finger.
Once a letter feels familiar in the tray, move it to paper while the memory is fresh. Print a name sheet from the free name tracing generator, or grab the printable handwriting practice sheets, and have your child trace the same letters they just made by hand. The touch practice and the pencil practice reinforce each other.
Make a name tracing worksheet
Type a name, pick a font, and print a free tracing sheet to practise with.